Free Shipping in the contiguous U.S.
$0.00 0

Cart

No products in the cart.

Ultimate RV Dewinterization Guide: Get Your RV Ready for Spring

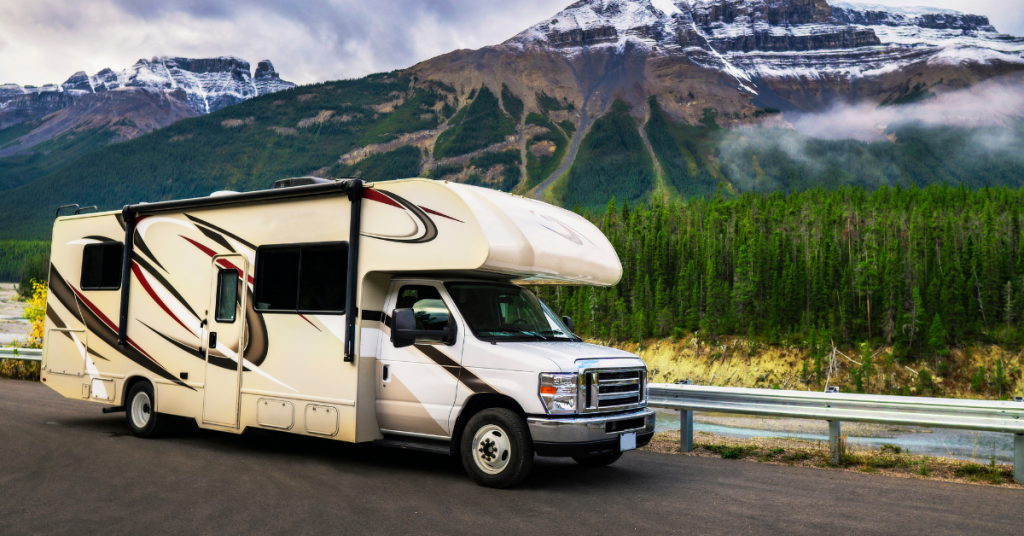
As the cold winter months gradually fade away, it’s time to dust off your RV and prepare for the adventures that lie ahead in the upcoming RV season. Whether you’re a seasoned traveler or a new to RVing, dewinterizing your RV is an essential step to ensure everything is in top condition for your journeys. At Point Zero Energy, we understand the excitement of hitting the road, which is why we’ve put together this comprehensive guide to help you dewinterize your RV efficiently and effectively.

Understanding the Importance of RV Dewinterization:

Dewinterizing your RV is more than just a routine maintenance task; it’s a crucial step in ensuring your RV is safe and ready for use after being dormant during the winter months. Winterization protects your RV’s plumbing system from freezing temperatures by draining water and adding antifreeze. However, reversing this process is essential to get your RV back in working order for the upcoming season. Let’s get into it!

RV Dewinterization Step 1: Inspect the RV Exterior & Tires

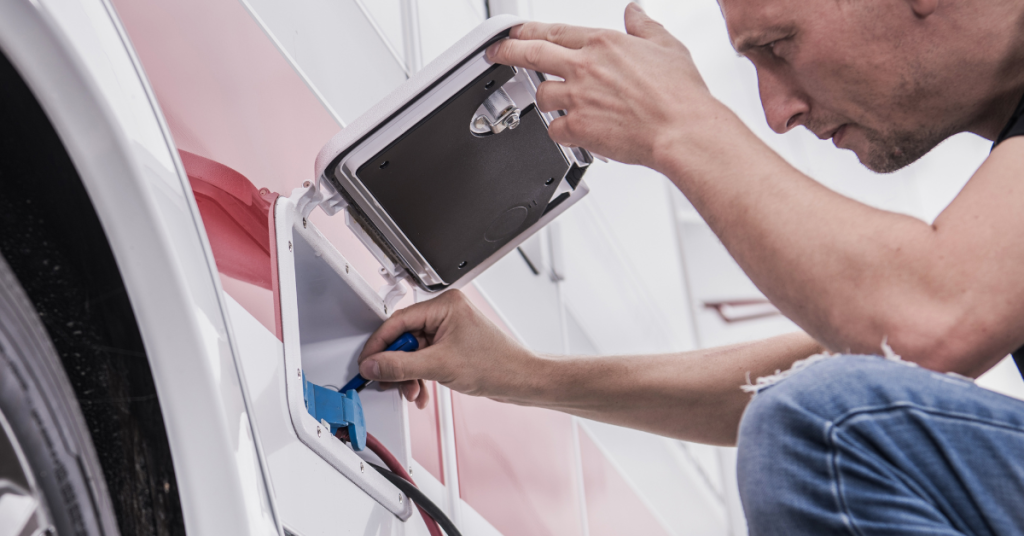
To start your RV dewinterization, examine every inch of the exterior of your RV. It may sound tedious, but it is extremely important to not skimp on this step. Check it over carefully for any signs of wear and tear that might have happened during the winter months. Be sure to give extra attention to areas that are prone to problems, such as the roof, windows, and seals. Climb up onto the top of your RV and give the roof a good examination, scanning for any cracks or loose spots. Check each window, making sure they’re all still in good shape and not letting any drafts in. Finally, inspect the seals around doors, storage compartments, and any other exterior openings to ensure they are intact and capable of keeping water out. It might not be the most glamorous job, but making sure your RV’s exterior is in good condition now will save you headaches later on down the road.


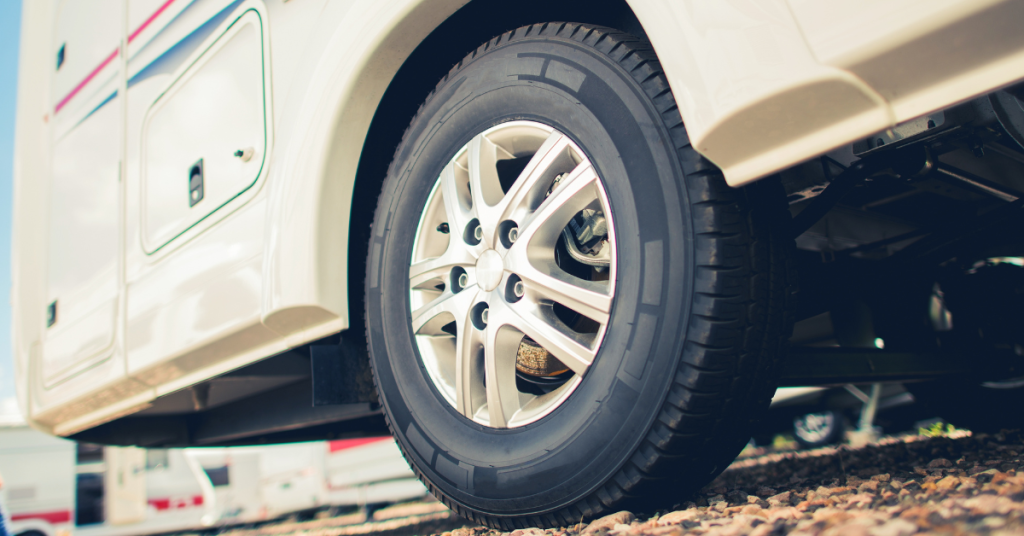
Another important part of checking the exterior on your RV, is checking the tires. Ensuring they’re properly inflated, free from cracks or damage, and have adequate tread is essential for a safe and smooth journey. Under- or over-inflated tires can affect handling and fuel efficiency, while worn-out tires could lead to a blowout on the road. Regular tire checks are a key part of RV maintenance that shouldn’t be overlooked.

RV Dewinterization Step 2: Check your RV Battery

Cold weather can drain your RV’s battery, so it’s essential to check its condition during RV dewinterization. Follow these step-by-step instructions to assess and maintain your RV battery:

1. Perform a Visual Inspection of your RV Battery

  • Check for Physical Damage: Look for cracks, bulges, or leaks in the battery casing.
  • Inspect Terminals: Ensure terminals are intact and free from corrosion.
  • Look for Discoloration or Leaks: Any unusual appearance may indicate internal damage.

2. Test the Battery Voltage on your RV battery

  • Fully Charge the Battery: Connect the battery to a charger and allow it to reach full capacity.
  • Let the Battery Rest: After charging, disconnect it and let it sit for at least 3 to 5 hours to dissipate surface charge.
  • Measure Voltage: Use a voltmeter or multimeter to check the voltage.
    • A fully charged 12-volt battery should read between 12.7V and 13.2V.
    • Readings below 12.4V may indicate sulfation, affecting the battery’s ability to hold a charge.
    • A reading of 0V suggests a possible short circuit.
    • If the voltage doesn’t exceed 10.5V during charging, the battery may be dead and require replacement.

3. Conduct a Load Test on your RV battery

  • Prepare for Testing: Ensure the battery is fully charged.
  • Connect a Voltmeter: Attach the voltmeter to the battery terminals.
  • Start the RV Engine: This applies a load to the battery.
  • Observe Voltage Drop: A healthy battery should maintain a voltage between 9.5V and 10.5V for 30 seconds under load.
    • If the voltage drops rapidly, the battery may be failing and should be tested further or replaced.

4. Monitor RV Battery Performance

  • Regular Checks: Periodically test voltage and inspect for signs of wear.
  • Maintain Charge: Keep the battery charged, especially during periods of inactivity.
  • Use a Battery Maintainer: A maintainer can help preserve battery life during storage.

Properly dewinterizing your RV’s battery is essential for ensuring reliable performance during your travels. By conducting a thorough visual inspection, testing the voltage, performing a load test, and maintaining clean terminals, you can identify potential issues and address them promptly. Taking these proactive steps will help prevent unexpected battery failures and ensure your adventures on the road are both safe and enjoyable.

RV Dewinterization Step 3: Flush the RV Water System

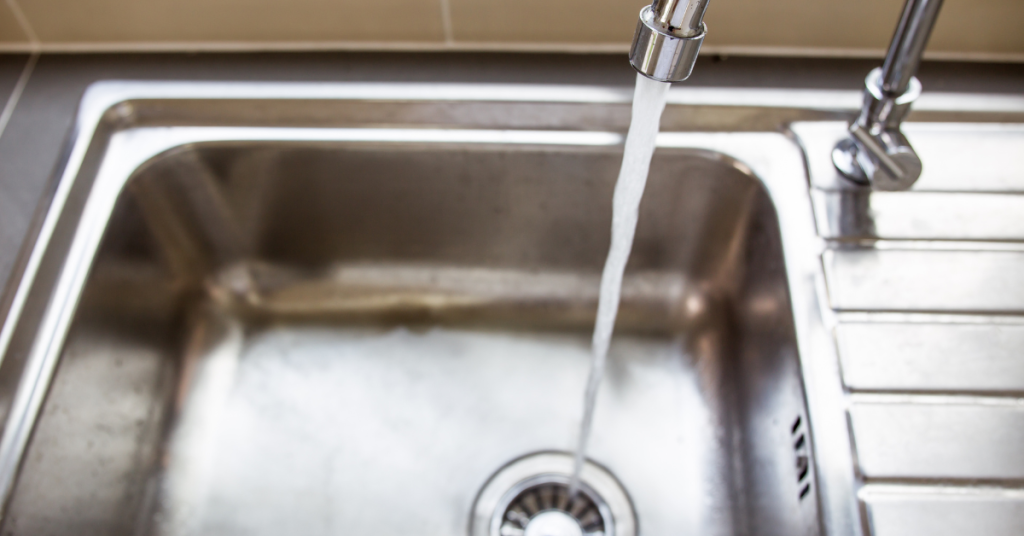
Flushing your RV’s water system is a crucial step in the dewinterization process, ensuring that all traces of antifreeze are removed and your water is safe for use. Follow these detailed steps to properly flush and sanitize your RV’s water system:

1. Prepare the RV for Flushing

  • Reconnect Water Supply: If you disconnected any water lines or components during winterization, ensure they are properly reconnected.
  • Close All Drains: Verify that all drains and low-point drain valves are closed to prevent leaks during the flushing process.

2. Remove Antifreeze from the Plumbing System

  • Drain the Fresh Water Tank: If you added antifreeze to the fresh water holding tank, drain it completely before adding fresh water.
  • Add Fresh Water: Fill the fresh water tank with potable water.
  • Flush the System:
    • Using the Water Pump: Turn on the RV’s water pump.
    • Open All Faucets: Starting with the faucet furthest from the water source, open each hot and cold faucet, including sinks, showers, and outdoor showers.
    • Run Water Until Clear: Allow water to flow through each faucet until it runs clear, indicating that the antifreeze has been purged from the lines.
    • Flush Toilets: Operate the toilet flush valve until clear water runs into the bowl.

3. Address the RV Water Heater

  • Bypass Mode Check: If your water heater was in bypass mode during winterization, return it to normal operation mode.
  • Drain the Water Heater: Remove the drain plug or open the drain valve to empty any antifreeze or stagnant water.
  • Flush the Water Heater: With the drain open, use a hose to flush out any sediment or residual antifreeze.
  • Close and Refill: Replace the drain plug, close the valve, and allow the water heater to refill with fresh water.

4. Sanitize the Water System

  • Prepare a Bleach Solution: Mix 1/4 cup of household bleach for every 15 gallons of fresh water tank capacity with water in a one-gallon container.
  • Add to Fresh Water Tank: Pour the bleach solution into the fresh water tank.
  • Distribute the Solution: Turn on the water pump and open all faucets until you smell bleach at each outlet, then close them.
  • Let It Sit: Allow the solution to remain in the system for at least 12 hours to disinfect the lines.
  • Flush the System Again: Drain the system completely and refill with fresh water. Open all faucets and run water until the bleach odor is gone.

5. Final Steps

  • Check for Leaks: Inspect all plumbing connections and fixtures for signs of leaks during and after the flushing process.
  • Replace Water Filters: If you removed any water filters before winterization, reinstall them or replace them with new ones.
  • Test Appliances: Operate water-dependent appliances like the water heater, refrigerator (if it has a water line), and washing machine to ensure they function correctly.

By following these steps, you can ensure your RV’s water system is free from antifreeze and safe for use, providing a fresh start for your upcoming adventures.

RV Dewinterization Step 4: Check RV Appliances

Ensuring that all appliances and systems in your RV are functioning correctly is a vital step in the dewinterization process. This not only guarantees comfort during your travels but also helps identify potential issues before they become major problems. Here’s a comprehensive guide to testing and inspecting your RV’s appliances and systems:

1. Inspect the RV Propane System

  • Check Propane Levels: Ensure your propane tanks are adequately filled.
  • Examine Hoses and Connections: Look for signs of wear, cracking, or damage on hoses. Apply a soapy water solution to connections and hoses; bubbles indicate leaks. If a leak is detected, turn off the propane supply immediately and have the system serviced by a professional.

2. Test the RV Refrigerator

  • Clean the Interior: Remove any residual odors or mildew by wiping down surfaces with a mild cleaner.
  • Power On: Connect the RV to a power source and turn on the refrigerator.
  • Verify Cooling Function: Allow the refrigerator to run for several hours and check that it maintains the appropriate temperature.
  • Test on Propane Mode: If applicable, switch the refrigerator to propane mode to ensure it operates correctly on both power sources.

3. Examine the Stove and Oven

  • Clean Burners and Surfaces: Remove any debris or dust that may have accumulated.
  • Ignite Burners: Light each burner individually, observing the flame for consistency and proper color (a steady blue flame indicates efficient combustion).
  • Test the Oven: Light the oven burner and verify that it reaches and maintains the set temperature.
  • Check for Gas Odors: Be attentive to any unusual smells during operation, which could indicate a leak.

4. Assess the HVAC System

  • Inspect Air Filters: Clean or replace filters to ensure optimal airflow and air quality.
  • Test the Air Conditioning: Set the thermostat to a cooling temperature and turn on the A/C unit, ensuring it blows cold air and operates without unusual noises.
  • Test the Heating System: Set the thermostat to a warming temperature and activate the furnace, confirming it produces heat and functions correctly.
  • Examine Ductwork and Vents: Ensure all vents are unobstructed and ducts are free from damage or blockages.

5. Verify the Water Heater

  • Inspect for Leaks: Examine the area around the water heater for signs of water leakage.
  • Fill the Tank: Ensure the water heater tank is full of water before powering it on to prevent element damage.
  • Power On: Activate the water heater and allow it to reach operating temperature.
  • Test Water Temperature: Open hot water faucets to confirm that hot water is being delivered consistently.

6. Check the Electrical System

  • Inspect the Power Cord: Look for signs of wear or damage on the main power cord.
  • Test Outlets: Use a circuit tester to ensure all electrical outlets are functioning properly.
  • Examine the Breaker Panel: Ensure all breakers are in good condition and reset any that have tripped.
  • Test GFCI Outlets: Press the test and reset buttons on Ground Fault Circuit Interrupter outlets to confirm they operate correctly.

7. Evaluate Additional Appliances

  • Microwave: Place a cup of water inside and run the microwave to ensure it heats properly.
  • Television and Entertainment Systems: Power on all devices to verify functionality and check for signal reception.
  • Washer/Dryer Units: Run a short cycle to confirm they operate without issues.

8. Inspect Safety Devices

  • Smoke Detectors: Test each unit by pressing the test button; replace batteries if needed.
  • Carbon Monoxide Detectors: Test functionality and replace batteries as necessary.
  • Propane Leak Detectors: Ensure they are operational and not expired.
  • Fire Extinguishers: Check the pressure gauge to ensure it’s charged and verify the expiration date; replace or service if necessary.

By testing and inspecting each appliance and system in your RV, you can address any issues proactively, ensuring a safe and comfortable RV experience. Regular maintenance and thorough checks are key to prolonging the life of your RV’s components and preventing unexpected malfunctions during your travels.

RV Dewinterization Step 5: Inspect Your RV Generator

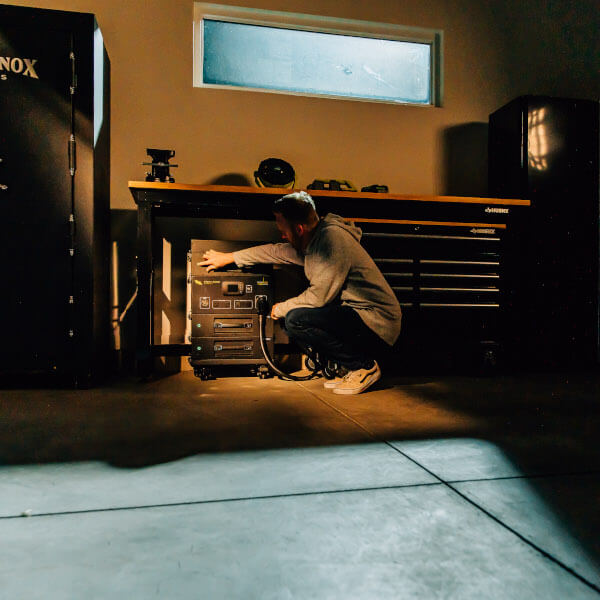
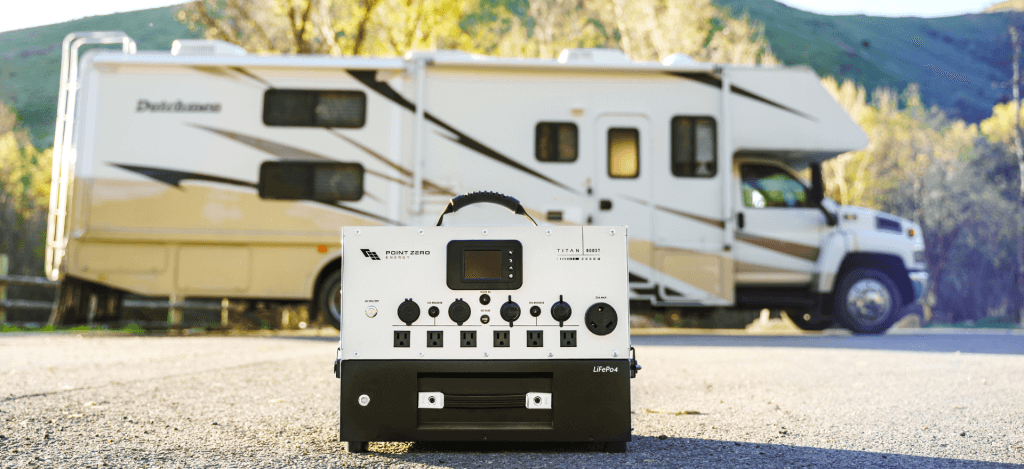
Ensuring your RV’s alternative power sources are in optimal condition is essential for a seamless and enjoyable travel experience. Both gas and solar generators require regular maintenance to function efficiently and safely. Below are tailored guidelines for each type:

Gas Generator Dewinterization

Begin by inspecting the generator’s exterior for any signs of damage or wear. Ensure that all covers and access panels are secure. Next, check the fuel system for leaks and ensure the fuel lines are in good condition. It’s advisable to change the oil and replace the oil filter to maintain engine health. Additionally, inspect and clean the air filter to ensure optimal performance. Once these steps are completed, run the generator under load for a short period to ensure it operates correctly. This process helps in identifying any issues early and ensures the generator is ready for use.

Solar Generator Dewinterization

Solar generators require less maintenance compared to gas generators. Start by inspecting the solar panels for any damage or debris. Clean the panels gently to remove any dirt or buildup that may have accumulated during storage. Next, check the battery connections for corrosion and ensure they are tight. If your solar generator has a charge controller, verify that it is functioning correctly and that the settings are appropriate for the current season. Ensure that the solar panels are properly connected and positioned to receive maximum sunlight exposure. Once these steps are completed, monitor the system to ensure it is charging the batteries effectively. Regular monitoring will help in identifying any issues early and ensure the solar generator is ready for use.

If you are interested in the difference between gas generators and solar generators check out our article here: Portable Solar Generators vs Gas Generators: Which One is Right for You?

By following these steps, you can ensure that both your gas and solar generators are properly prepared for RV season, providing reliable power for all your adventures.

RV Solar generator infront of an RV

RV Dewinterization Step 6: Restock RV Emergency Supplies

Ensuring your RV is equipped with essential supplies is vital for safety and preparedness during your travels. Properly stocked emergency and first aid kits can make a significant difference in handling unexpected situations effectively. Regularly updating these supplies not only ensures their availability but also guarantees their functionality when needed most. By restocking and organizing these RV supplies, you can enhance your RV’s preparedness for a safe and enjoyable camping season. Here’s how to restock and organize your RV’s emergency and first aid kits:

First Aid Kit:

  • Inventory Check: Regularly assess your first aid kit to ensure all items are present and in good condition.
  • Restocking Essentials: Replace any used or expired items promptly. Commonly needed supplies include bandages, antiseptics, tweezers, scissors, and over-the-counter medications.
  • Personal Medications: Ensure you have an adequate supply of any personal medications, and check their expiration dates.

Emergency Supplies:

Sunscreen and Insect Repellent: Include sunscreen and insect repellent in your emergency kit to protect against sunburn and insect bites during outdoor activities.

Non-Perishable Food: Stock up on a variety of non-perishable food items, such as canned goods, dried fruits, and energy bars, to sustain you during unforeseen circumstances.

Bottled Water: Maintain a sufficient supply of bottled water to meet your hydration needs in emergencies.

Tools and Equipment: Equip your RV with essential tools for emergency repairs, including pliers, a hammer, screwdrivers, extra oil and coolant, hoses, batteries, and leveling blocks.

Fire Extinguisher: Check the expiration date on your fire extinguisher and replace it if necessary. If it’s a dry powder extinguisher, shake it to prevent powder from settling.

Safety Alarms: Familiarize yourself with the sounds of your RV’s safety alarms, such as smoke and carbon monoxide detectors, to respond appropriately in emergencies.

RV Dewinterization Step 7: Confirm Your RV Registration and Insurance

The final step to ensure it’s ready for travel is getting your paperwork in order. Verify that your RV registration is current, and check your insurance and emissions sticker. While towable RVs may not require insurance in some areas, it’s wise to have coverage to protect your camper in case of an accident. Make sure to store all your important RV documents in an easily accessible location. That way, if you’re pulled over or involved in an accident, you’ll have all the necessary paperwork readily available.

Conclusion: Ultimate RV Dewinterization Guide

In conclusion, preparing your RV for the season isn’t just about maintenance—it’s your ticket to a world of adventure! By taking the time to dewinterize your systems, update your insurance, and stock up on essential supplies, you’ll be setting yourself up for stress-free, memorable road trips. With everything in top shape, you’ll be ready to hit the open road, explore new destinations, and embrace all the freedom that comes with RV life. Adventure awaits, so get your RV ready and go make those unforgettable memories!


Let’s hit the road! 🚐

    Leave a Reply

    Your email address will not be published. Required fields are marked *

    connect with us
    download our app


    By submitting this form you are consenting to receive emails from PointZeroEnergy.com.

    $50 OFF

    Subscribe to our emails and get $50 off any order over $499!


    By submitting this form you are consenting to receive emails from PointZeroEnergy.com.